Installation
Installing the CLI can be done in different ways depending on your operating environment.
Polykey Core Overview
The Polykey CLI and core primarily use TypeScript for service logic, domain business operations, and persistence layers. While the main codebase is in TypeScript, some supporting libraries incorporate native C++ or Rust for platform‐specific functionality. This approach combines cross‐platform convenience with native performance optimizations. Polykey-CLI has only been tested on Linux and macOS. We are working on supporting other platforms. There's minor teething problems when it comes supporting other platforms. Help us by reporting any issues with the CLI tool in our Github Repo here or by dropping a message to the developers in our discord server here
- Linux
- MacOS
- Windows
- Docker
- npm
- Source
Linux
Polykey-CLI code is compiled, bundled and wrapped into a single file executable. You just have to download the executable, give it executable permissions and run it. The executable is not statically linked. It requires a subset of the system libraries that Node.js requires.
libdl.so.2libstdc++.so.6libm.so.6libgcc_s.so.1libpthread.so.0libc.so.6
Manually
Using the Polykey CLI via the terminal
If you prefer not to use a package manager or Docker, you can install Polykey directly via the terminal using a prebuilt binary.
-
Download the executable from the GitHub releases page and rename it to
polykey. -
Make it executable:
chmod u+x ./polykey
- Add the executable to your PATH
To run polykey from anywhere, you need to add the directory containing it to
your PATH. You can either:
- Move
polykeyinto an existing directory already in yourPATH(e.g.,/usr/local/bin), or - Add the polykey directory to your
PATH, either temporarily or permanently:
Temporarily (until terminal closes):
export PATH="$HOME/Downloads:$PATH"
Permanently:
- For zsh
- For bash
To permanently add polykey to PATH on zsh, run the following command.
echo 'export PATH="$HOME/Downloads:$PATH"' >> ~/.zshrc && source ~/.zshrc
To permanently add polykey to PATH on bash, run the following command.
echo 'export PATH="$HOME/Downloads:$PATH"' >> ~/.bashrc && source ~/.bashrc
Where you place the polykey binary — and how you add it to your PATH —
depends on your OS:
-
Linux: Preferred location is
~/.local/bin(you may need to create it usingmkdir -p ~/.local/bin). Make sure this directory is included in your$PATH— often via~/.bashrc,~/.bash_profile, or~/.profile. -
macOS: Same as Linux — use
~/.local/binor~/bin. Update your$PATHin~/.zshrc(ZSH is default on macOS since Catalina) or~/.bash_profileif using Bash. -
Windows: Place
polykey.exeinto:
%USERPROFILE%\AppData\Local\Microsoft\WindowsApps
This location is typically already included in the system PATH.
To verify it’s working, run:
which polykey
polykey --version
- Confirm the installation with:
polykey --version
If it returns the version, you’re ready to use the CLI.
Once you start a long‑lived command like polykey agent start, that process
monopolizes the current terminal window. To issue any further Polykey commands
(for example, polykey vaults create) you must open a new terminal window.
If the machine reboots or the agent exits, simply rerun polykey agent start in
a terminal to restart it.
If you see an error like:
WARN:polykey.PolykeyAgent:Failed Creating PolykeyAgent — another agent may already be running
This means the Polykey agent is already running. To manage this, you can:
Check the agent status:
polykey agent status
If the agent returns something like this:
status DEAD
Then the agent is inactive and needs to be restarted. If it returns something other than this, then it is still active.
Stop the running agent:
polykey agent stop
You must stop the current agent or use a different terminal before starting a new one. The currently running agent must be stopped before it can be re-run.
NixOS
We have not yet published a Nix package for Polykey. When we do, you will be
able to just install polykey-cli from Nixpkgs.
However, it is easy enough to install it from source.
Clone the repository:
git clone https://github.com/MatrixAI/Polykey-CLI.git
Enter the nix-shell:
nix-shell
Build the application and install it into the user profile:
nix-env -f ./release.nix --install --attr application --argstr npmDepsHash "$(prefetch-npm-deps ./package-lock.json)"
Other
We are working on other distribution methods. Check back soon.
MacOS
The file polykey-cli-V.V.V-darwin-universal is not truly universal — it
only supports ARM64-based Macs (Apple Silicon: M1, M2, M3, etc).
It will not run on Intel-based Macs.
If you're using an Intel Mac, you must build Polykey from source.
Instructions are provided in the Source section.
Manually
-
Download the Polykey CLI for macOS from the GitHub releases page. Look for the file named
polykey-cli-V.V.V-darwin-universal, whereV.V.Vis the version number. For Mac, you want to download the file with thedarwin-universalfile extension. -
Rename the downloaded file to
polykeyfor easier access. In your terminal, make sure to navigate to the directory where the file is located (usually the Downloads directory) and run the following command:
mv polykey-cli-V.V.V-darwin-universal polykey
- Navigate into the directory where the file is saved to execute commands.
- Replace
V.V.V.with the actual version number of the file you downloaded.
- Make the file Executable: Before you can run the Polykey CLI, you need to
make it executable. Use the
chmod +xcommand to add executable permissions to the file. Replacepolykeywith the actual name of your file if it's different:
chmod +x polykey
MacOS Security Bypass
MacOS requires additional steps for the binary to be allowed to execute, this is due to the fact that as of 20-12-23, the binaries we release are unsigned, and MacOS permits running of unsigned binaries, however, to progress past this, there are a couple options:
- Method #1 - Admin CLI
- Method #2 - Apple Setting GUI
Method #1 - quickest method
The xattr command will remove the quarantine attribute from the Polykey
executable, allowing you to run it without triggering macOS security warnings.
Remember to ensure that the file path matches the location of your polykey file.
sudo xattr -r -d com.apple.quarantine ~/Downloads/polykey
If you have completed this sucessfully, you may ignore Method #2 and move to the
next section on how to add polykey to your $PATH.
Method #2 - Using the Apple Systems Settings GUI
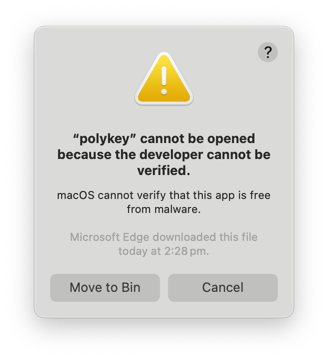
First type the following command to try running the Polykey CLI but will instead trigger a pop-up.
./polykey --version
- MacOS will then prompt you with the following:
not appear in the next step. :::
- While keeping the prompt open, head over to
Settings -> Privacy & Securityand scroll down till you see '"polykey" was blocked from use because it is not from an identified developer.'
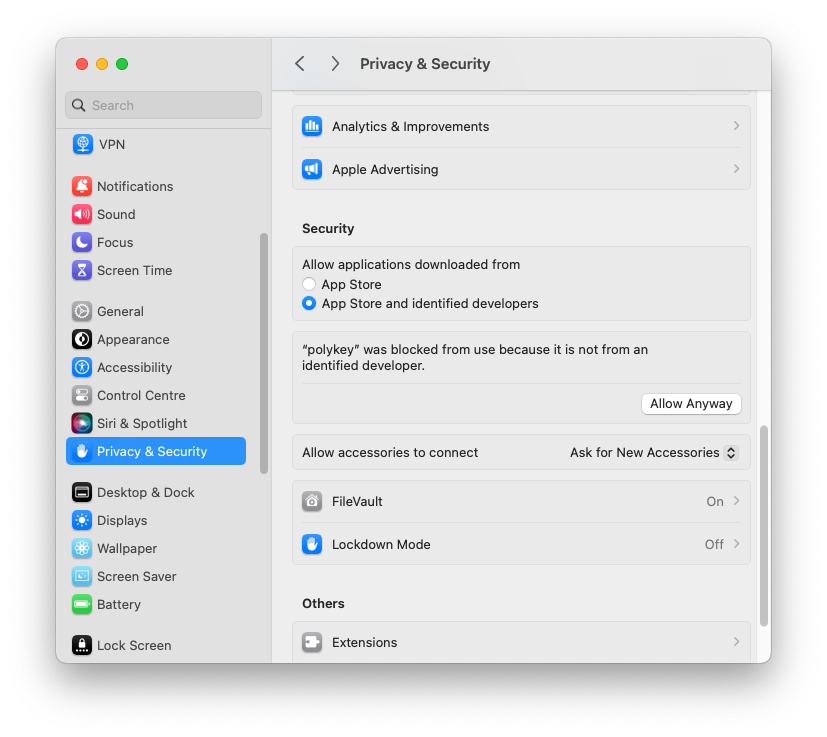
-
Click on
Allow Anywayand authenticate. -
Try opening polykey with
sudo ./polykey
When prompted in the terminal, type your administrator password and hit enter.
- Following this, you will get another similar prompt
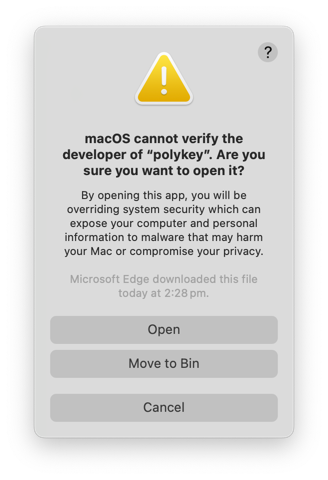
Click on Open and now Polykey-CLI should be running in your terminal window.
You can also verify the version of polykey that was installed with:
./polykey --version
Add Polykey to your $PATH.
To enable running the Polykey CLI from any directory in the terminal on macOS, you'll need to update your shell configuration file.
Once you start a long‑lived command like polykey agent start, that process
monopolizes the current terminal window. To issue any further Polykey commands
(for example, polykey vaults create), you must open a new terminal window.
If the machine reboots or the agent exits, simply rerun polykey agent start in
a terminal to restart it.
If you see an error like:
WARN:polykey.PolykeyAgent:Failed Creating PolykeyAgent — another agent may already be running
This means the Polykey agent is already running. To manage this, you can:
Check the agent status:
polykey agent status
If the agent returns something like this:
status DEAD
Then the agent is inactive and needs to be restarted. If it returns something other than this, then it is still active.
Stop the running agent:
polykey agent stop
You must stop the current agent or use a different terminal before starting a new one. The currently running agent must be stopped before it can be re-run.
- ZSH (default shell on recent macOS versions)
- Bash
For ZSH (default shell on recent macOS versions):
-
Navigate (cd) into the directory where the
polykeyexecutable is stored. -
Edit the Zsh configuration file to add
polykeyto your$PATH. Use the following command, ensuring to replace~/Downloadswith the correct path to thepolykeyexecutable if it's not in the downloads folder. For most users, this path would be~/Downloads.
Make sure you provide the path to polykey instead of the actual executable.
This is not the path: ~/Downloads/polykey. This is the correct path:
~/Downloads.
export PATH=~/Downloads:$PATH >> ~/.zshrc && source ~/.zshrc
The path export should not pint to the Polykey executable itself, but rather to the directory containing the executable. Otherwise, the executable will not be found and will not work.
For Bash:
cdinto the directory where the "polykey" executable is stored.- Edit the Bash config to add "polykey" to your path. To streamline the
process, run the following command, making sure to change the path to
"polykey" if the executable is not in the downloads folder. For most users,
this would be
~/Downloads
Make sure your path to the "polykey" executable is correct. Replace downloads
with the path to the working directory
export PATH=~/downloads:$PATH >> ~/.bashrc && source ~/.bashrc
You can check if the PATH environment variable for Polykey has been updated correctly by running:
polykey --version
If this command returns the current version, then you have successfully added Polykey to your PATH, and you can now run polykey from anywhere in your terminal.
Polykey for windows should be working but we have yet to create documentation on the installation process for this. Check back soon!
Docker
The Docker image can be used so that Polykey can be deployed into the cloud. It is also possible to use the CLI via the docker container, but it isn't as convenient. The intention is to run the Polykey agent in the cloud.
Docker images is released on GitHub: https://github.com/MatrixAI/Polykey-CLI/releases.
Download the image named ...-docker-image-polykey-cli-V.V.V.tar.gz and rename
it to docker-image-polykey-cli.tar.gz.
Load it into Docker:
loaded="$(docker load --input "$(nix-build ./release.nix --attr docker --argstr npmDepsHash "$(prefetch-npm-deps ./package-lock.json)")")"
image="$(cut -d' ' -f3 <<< "$loaded")"
docker run -it "$image"
Docker for Mac
You can install nix for MacOS and then follow the general docker instructions above. Nix for mac can be installed by running
sh <(curl -L https://nixos.org/nix/install)
-
Download the latest build of Polykey-CLI for docker from https://polykey.com/download.
-
Download Docker for MacOS depending on your instruction-set (arm vs x86) from https://docs.docker.com/desktop/install/mac-install/
-
Rename the Polykey dist from
x-docker-image-polykey-cli-x.x.x-alpha.x.tar.gztodocker-polykey.tar.gz -
Load the image in docker using the following:
docker load --input docker-polykey.tar.gz
- Go to your docker application and configure the Polykey image
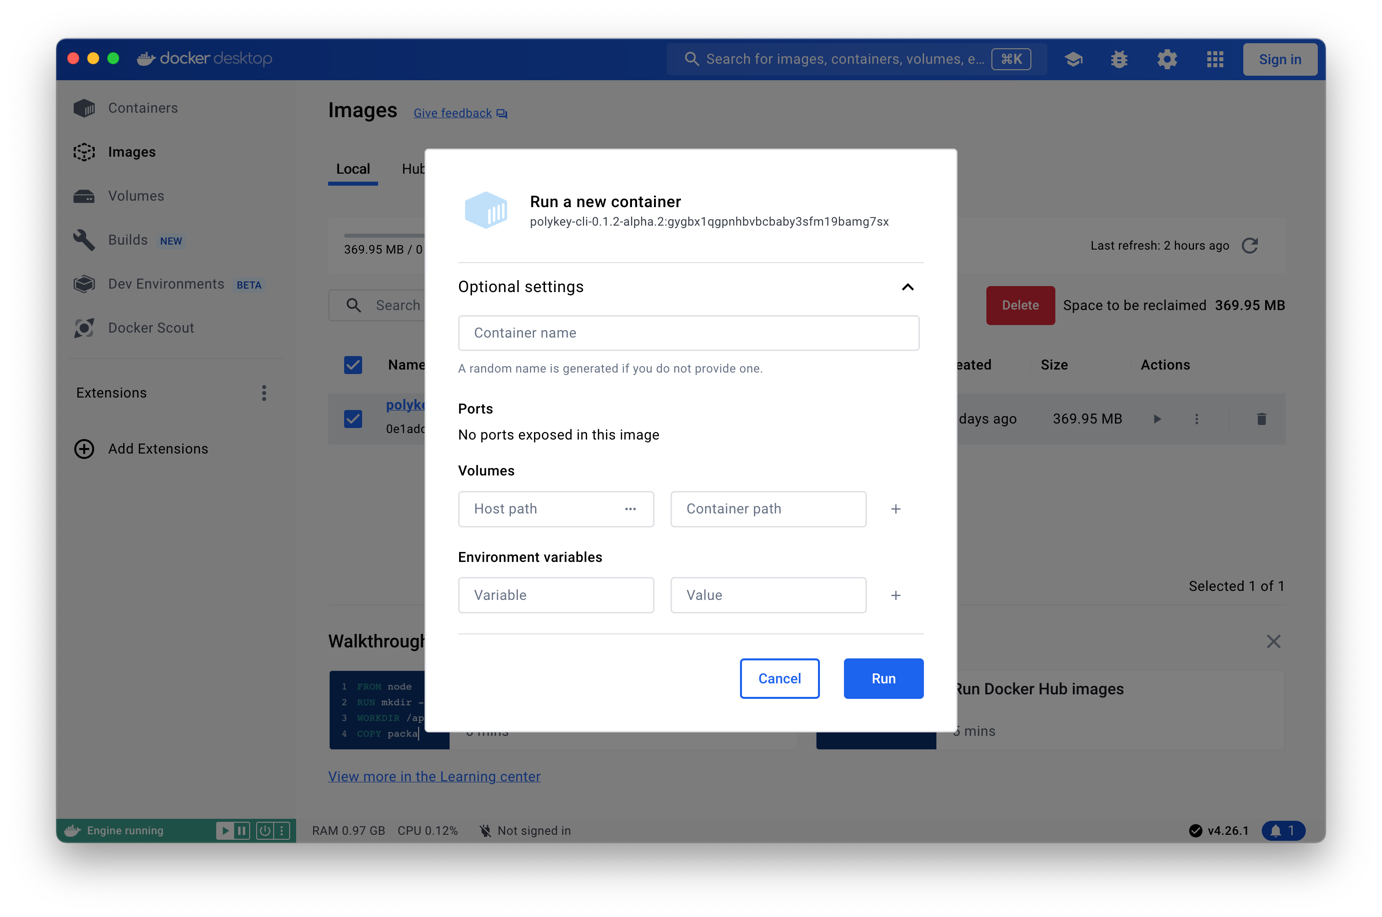
-
Run
mkdir /tmp/polykeyto create a directory for the polykey nodepath -
Set the volume host path to
/tmp/polykeyand the container path to/tmp/polykey/ -
Run
docker imagesto grab the Image ID of your installed image.
> docker images
REPOSITORY                  TAG                                IMAGE ID       CREATED       SIZE
polykey-cli-0.1.2-alpha.2   gygbx1qgpnhbvbcbaby3sfm19bamg7sx   0e1addd9855a   12 days ago   370MB
- Now you can run Polykey as an agent with the following shell command
docker run -it 0e1addd9855a agent start --background -np /tmp/polykey
Once you start a long‑lived command like polykey agent start, that process
monopolizes the current terminal window. To issue any further Polykey commands
(for example, polykey vaults create), you must open a new terminal window.
If the machine reboots or the agent exits, simply rerun polykey agent start in
a terminal to restart it.
If you see an error like:
WARN:polykey.PolykeyAgent:Failed Creating PolykeyAgent — another agent may already be running
This means the Polykey agent is already running. To manage this, you can:
- Check the agent status:
polykey agent status
Stop the running agent:
polykey agent stop
You must stop the current agent or use a different terminal before starting a new one.
Making sure to replace 0e1addd9855a with your corresponding image ID.
$ docker run -it  0e1addd9855a agent start --background -np /tmp/polykey
WARNING: The requested image's platform (linux/amd64) does not match the detected host platform (linux/arm64/v8) and no specific platform was requested
✔ Enter new password … *
✔ Confirm new password … *
pid         	28
nodeId      	vflhiouqt255gq22drpf0s639kl9eds3ralu094c6rsnmonemp6pg
clientHost  	127.0.0.1
clientPort  	45509
agentHost   	::
agentPort   	37468
recoveryCode	(random recovery code goes here)
Node Package Manager
The CLI is published as
npm package.
Install it with:
npm install polykey
This will install the Polykey-CLI into the path pointed to by the command
$(npm config get prefix).
If the npm bin path is added to the $PATH environment variable, then you
will be able to execute pk or polykey.
Source
The official source repository is on GitHub. There is an additional mirror on GitLab.
git clone https://github.com/MatrixAI/Polykey-CLI.git
Use npm install to setup the project.
If you have nix installed and nix-shell available, enter into nix-shell
and it will automatically setup the development environment.